Migration from MailStore Server to MailStore Cloud
Overview
The migration from MailStore Server to MailStore Cloud includes all emails with their metadata that are part of the selected export scope. The included metadata are:
- message date
- archive date
- location in MailStore Server archive
Emails and their metadata are cryptographically protected in the export and are retained in MailStore Cloud after the migration.
Users and permissions are not included in the migration.
The migration process consists of the following steps:
- Export from MailStore Server
- Upload to MailStore Cloud via SFTP
- Process the uploaded files in MailStore Cloud
- Recreate the archive structure of MailStore Server in MailStore Cloud
- Manage access to migrated archive mailboxes
Prerequisites
- Administrative access to MailStore Server
- SFTP client (e.g., FileZilla, WinSCP)
- Outbound internet access on TCP port 22 from MailStore Client
Preparation – Configure SFTP Access in MailStore Cloud
SFTP is used to upload exported archives to MailStore Cloud. Access to the SFTP server is only available to users with the Compliance role. Either create a new group with the Compliance role or add the Compliance role to an already existing group. Then assign any existing user or a new user to that group. Important: The user selected for the SFTP login must not have multi-factor authentication enabled in their account.
Step 1 – Create Export in MailStore Server
In MailStore Server you need a user with admin privileges and the archive access for administrators must be enabled. To initiate the export, connect to MailStore Server with the MailStore Client and sign in with an administrative account. If you do not have access to the whole archive, navigate to the Compliance General page (Administrative Tools/Compliance/Compliance General) and unblock access to the archive. Details about the compliance settings in MailStore Server are available in the MailStore Server Help.
If you want to filter the export by search criteria, you need to create a saved search first. Details about saved searches are available in the MailStore Server Help.
To create a new export profile, navigate to the Export E-mail page and create a new MailStore Cloud export by clicking E-mail Files and selecting MailStore Cloud Zip File.
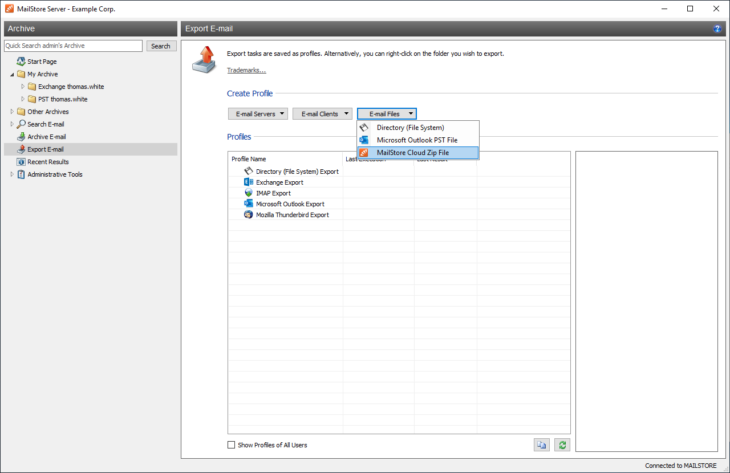
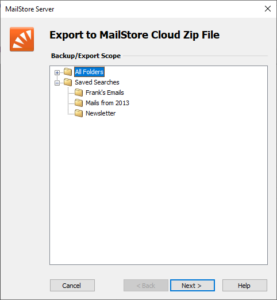
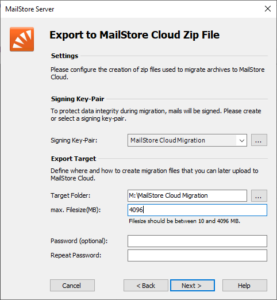
A wizard will guide you through selecting the scope and target for the export. The export will create a set of archive files with a maximum size of 4 GiB per file. Please make sure that you have enough disk space available for the export. After you have created the export profile, you can execute the profile to export the archived emails.
After the export has finished, you will find at least one archive file with the .mszip extension and a file with the public key of the export using the .cer extension in the target folder for the export.
Step 2 – Upload Export to MailStore Cloud
We recommend FileZilla as SFTP client for the upload, but you can choose any SFTP client supported by your operating system.
Sign in to MailStore Cloud Admin Access as administrator and navigate to the Uploads page. You will find the connection information for the SFTP client at the top of the page.
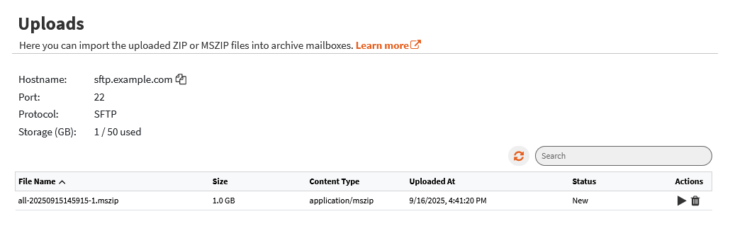
Start FileZilla and connect to MailStore Cloud using the connection information from the MailStore Cloud Admin Access. Locate the exported archives on your hard disk and upload the files in FileZilla. Do not upload the certificate (.cer file). It is needed in the next step. After a successful transfer of the files, you will see the uploaded files with a “(Pending)” prefix in your SFTP client. When the files are shown without this prefix, they are ready to get processed in the next step.
Step 3 – Process Uploaded Files in MailStore Cloud
Sign in to MailStore Cloud Admin Access as administrator and navigate to the Uploads page. If you are already on the Uploads page, use the refresh button to update the list of available uploads. You should see all of your uploaded files. For each file, click the start button to initiate the import. A new sidebar is shown to fill in the remaining information for the import.
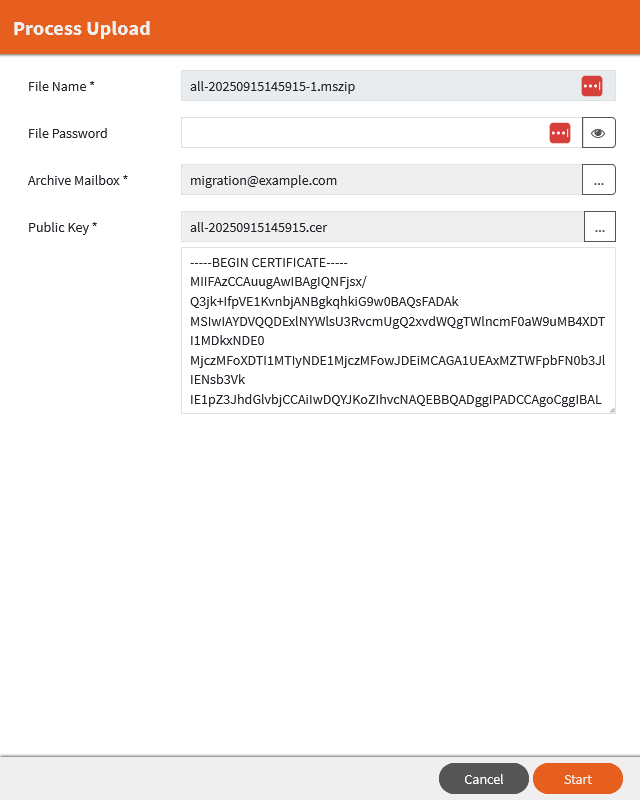
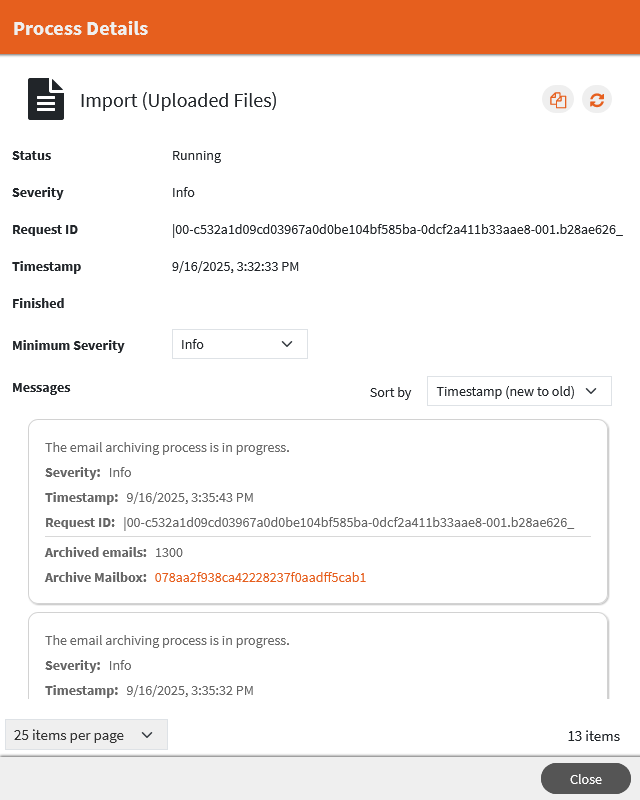
Please select an archive mailbox where all emails will be imported to. A separate archive mailbox should be used for the migration. Assignment of migrated mails to user archives is done in the next step. If you have defined a password for the exported archive, please enter the same password in the respective text box. Then select the certificate file that was created for the export next to the archive files. You can now start the import of the emails. The progress of the import can be monitored in the Process Log.
Depending on the available system resources, the import might not start immediately.
After an uploaded file is completely processed without issues, the file will be automatically deleted. If an issue occurs during processing of an uploaded file, you can retry the import. Already imported emails from a partially processed file are ignored.
Step 4 – Recreate Archive Structure in MailStore Cloud
After the import of the first file has finished, a new background task is automatically created to run every 15 minutes to process the metadata from the import to recreate the archive structure from MailStore Server. You can find this task on the Schedules page.
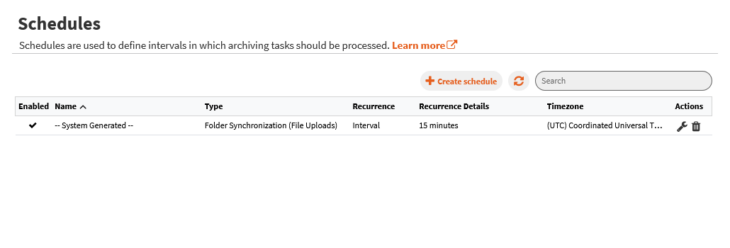
You can monitor the progress of the background task in the Process Log. After all imported files have been processed and the background task logs that there are no more reports to process, you can safely disable or delete the schedule for the background task.
Having processed all metadata from the import, new Archive Mailboxes are created representing the archive structure from MailStore Server. Log in to the MailStore Cloud Web Access as a Compliance user to see all migrated mailboxes, their folder structure and the emails that were migrated from MailStore Server.
You can process additional uploaded files even while this background task is currently running.
Step 5 – Manage Permissions to Imported Archive Mailboxes
Permissions to the imported archive mailboxes are not automatically assigned to users or groups. Instructions on how to manage permissions are available in the article about Archive Mailboxes.
Deletion of Uploaded Files
Successfully processed files are automatically deleted after processing. All uploaded files are retained for up to seven days before they are automatically deleted. Aside from automatic deletion, you can also manually delete uploaded files. To do so, sign in to the MailStore Cloud Admin Access, navigate to the Uploads page and delete the files via the delete icons.