AdminAccess: Uploads
Import Process Explained
The import of large amounts of e-mails from 3rd party sources is supported by uploading ZIP files containing e-mails in the EML format. The process consists of 3 steps, which will be explained in more detail below:
- Uploading ZIP files for Imports
- Importing Mails from ZIP files
- Import Folder Synchronization
Please read through all three steps before preparing and uploading your ZIP files.
![]() The Migration from MailStore Server to MailStore Cloud uses the same procedure. The detailed steps of such a migration are described in the linked article.
The Migration from MailStore Server to MailStore Cloud uses the same procedure. The detailed steps of such a migration are described in the linked article.
Uploading ZIP files for Imports
- Upload a ZIP file into the dedicated storage using SFTP.
- The storage quota for uploads is separate from the general storage quota. The “Uploads” page shows the remaining storage quota for uploads.
- An application that can be used for this is e.g. FileZilla. Please refer to the respective manual of the application of your choice for detailed instructions.
- Make sure to use SFTP as protocol. Neither FTP nor FTPS will work!
- The “Uploads” page displays the host name and port to use when configuring your SFTP application.
- Use a user with the “Compliance” role and with disabled two-factor authentication.
- Finishing the upload of a large file will take some time.
- While the upload is at 100%, the SFTP connection can become unresponsive for up to a minute.
- Important: Please deactivate any timeouts in your SFTP application!
- After that, the upload is first listed as pending in the SFTP session and does not yet apear on the Uploads page. It can take a couple of minutes until the upload leaves the pending state.
- While the upload is at 100%, the SFTP connection can become unresponsive for up to a minute.
Importing Mails from ZIP files
- Once the upload is completed, an import can be started from the “Uploads” page in the Admin Access.
- All mails of a ZIP will be archived into the same archive mailbox in MailStore Cloud. Multiple ZIP files can be archived into the same archive mailbox.
- MailStore recommends creating a dedicated archive mailbox per import.
- Only users with the role “Admin” can start an import as only administrators will be able to create the necessary archive mailboxes. Also, the “Admin” role is needed to delete an import manually.
- You can monitor the import’s progress in the process log.
- Important: ZIP files containing the same mail more than once can create warnings during the import. If you encounter this, please rerun the import into the same mailbox again. The second run will be much faster.
- Once the import is successfully finished, the ZIP file will be deleted automatically.
Synchronizing Folders
- Once the import is finished, an “Import Folder Sync” schedule is created automatically to run every 15 minutes.
- The job will create the folder structure that was found in the ZIP file in the archive mailbox the import was archived into.
Uploads
The page “Uploads” lets you view the ZIP files that were uploaded using SFTP (see above). It also shows the connection settings for configuring the SFTP application and the remaining quota for uploads. The quota for uploads is independent of the storage quota for mails.
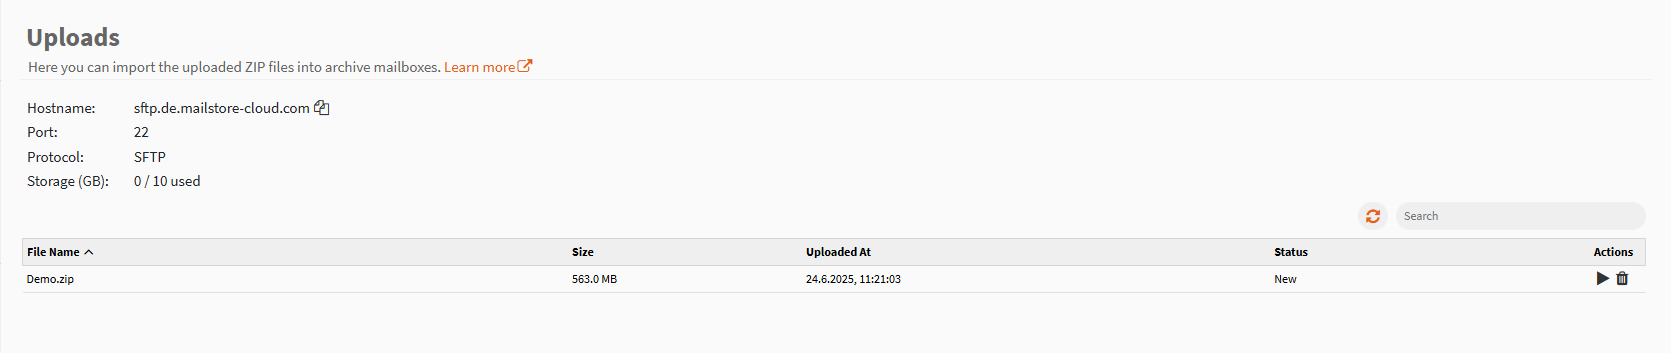
- Refresh – The refresh icon can be utilized if needed to refresh the page.
- Search – A search over the filename of the ZIP files.
- Actions
- Process Upload – Shows the dialog to start the import of the e-mails contained in the ZIP file.
- Delete – Lets you delete the ZIP file.
Process Upload
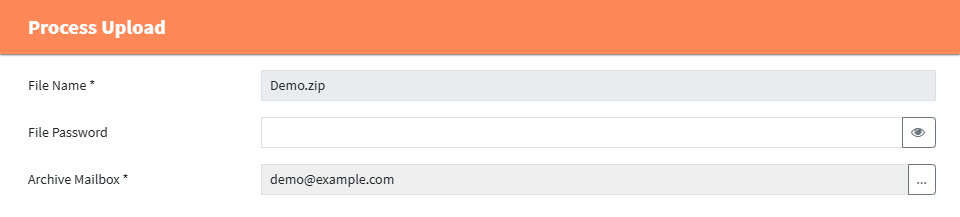
- File Name – The file containing the e-mails that are about to be imported
- File Password – If the ZIP file is password protected, the password must be provided here. Leave empty, if the ZIP file is unprotected.
- Archive Mailbox – Target archive mailbox for the e-mails contained in the ZIP file.
- MailStore recommends using a dedicated archive mailbox per upload.