First Setup: Import Data From MailStore Server
Deprecated feature: Migrating data to MailStore Cloud using Import Endpoints is a deprecated feature and will be removed in a future version. Please use the migration via SFTP uploads instead: Migration from MailStore Server to MailStore Cloud
Step 1: Create a public key in MailStore Server
- As a user with Admin rights, login to the MailStore Server with the client desktop.
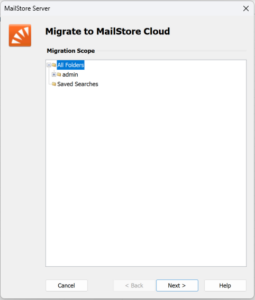
- Navigate to Export Email, in the Create Profile section open the E-mail Servers dropdown.
- Select MailStore Cloud.
- Choose which folder to be exported, then click Next.
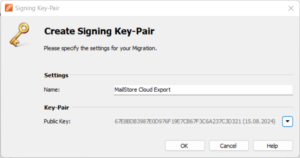
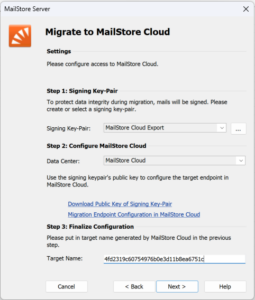
- Click [..] to open the Credentials Manager in Signing Key Pair.
- Create a new key pair or select an existing one.
Step 2: Configure MailStore Cloud
- Select the hosting region of your MailStore Cloud instance using the drop-down menu.
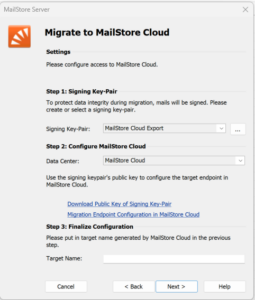
- Click Download Public Key of Signing Key-Pair to save the public key.
- Click Migration Endpoint Configuration in MailStore Cloud. MailStore Cloud Admin Access will open in your browser.
- Login with Admin user credentials.
Create an import endpoint in MailStore Cloud
- In Admin Access, navigate to Import Endpoints.
- Select Create import endpoint.
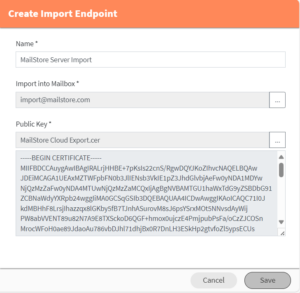
- Enter a name in the Name text field.
- Select a mailbox to import or create a new one. It is recommended to create a specific mailbox that is only used for the import. To do so:
- Click […]
- Click the +
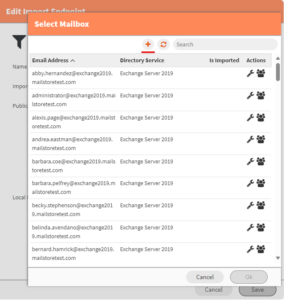
- Create a new Mailbox. Note: The email address does not need to exist.
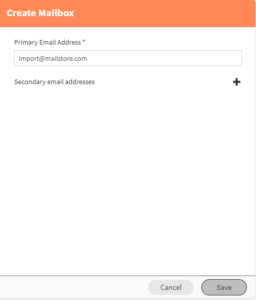
- Select Save.
- Select OK to import the mailbox.
- Select the public key that was downloaded in Step 1: Create a public key in MailStore Server.
- Click Save.
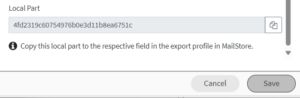
- After saving, you can copy the local part to be used as target in the MailStore Server configuration by Selecting Copy.
Step 3: Finish export profile in MailStore Server
- Navigate back to MailStore Server.
- For the Target Name, enter the import endpoint’s local part that was established in the previous step.
- Click Next.
- Enter a name for the Export Profile.
- Leave the checkbox Run after clicking Finish. The export will run directly after saving the configuration.
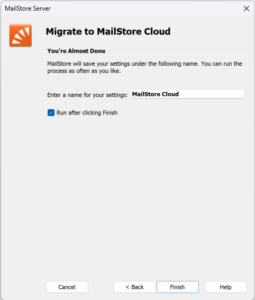
- Click Finish.
- Wait until the export job finished to move onto the next section.
Step 4: Process in MailStore Cloud
Create import schedule in MailStore Cloud
- Navigate back to Admin Access.
- Navigate to Schedules, then select Create schedule.
- In the Type dropdown menu, choose Import Folder Synchronization.
- Select the import endpoint that was created in the step “Create an import endpoint in MailStore Cloud“.
- Enter a name in the Name text field.
- The job will need to run only once, so the recurrence can be set to Once.
Note: A schedule with the Once recurrence must always be timed at least 1 minute in the future for it to be executed. - Click Save.
- Wait for the import job to be finished
Assign imported mailboxes to users
- Navigate to Mailboxes in the Admin Access.
- Search for mailboxes imported from MailStore Serve,
Note: They will have a checkmark “Is Imported”. - Click the Users icon under Actions.

- Add users/groups who should have access to the mailbox.