Concept
Email journaling is the process of capturing and storing email communications for compliance, regulatory, legal, and archival purposes.
It involves recording all inbound and outbound email messages. This includes not only the email content but also metadata such as sender, recipient, date, and time stamps.
As emails are sent or received, they are automatically copied and sent to the journaling system. This happens in real-time or near-real-time to ensure no email is missed.
MailStore Cloud’s Journaling Endpoints are the destination for such journaling processes. For more information, see the Journal Endpoints article.
Configuration
Microsoft 365 Push Journaling
Journaling from Microsoft 365 is used to push emails directly into the MailStore archive.
Create a Journaling Endpoint
To create a Journaling endpoint in MailStore AdminAccess:
Create a Journaling Endpoint in MailStore Cloud
- AdminAccess -> Journal Endpoints -> Add journal endpoint
- Give a name
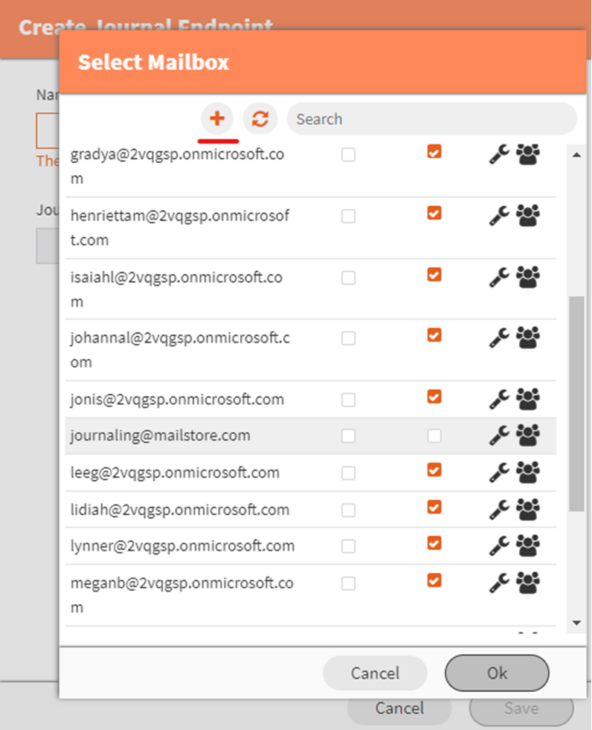
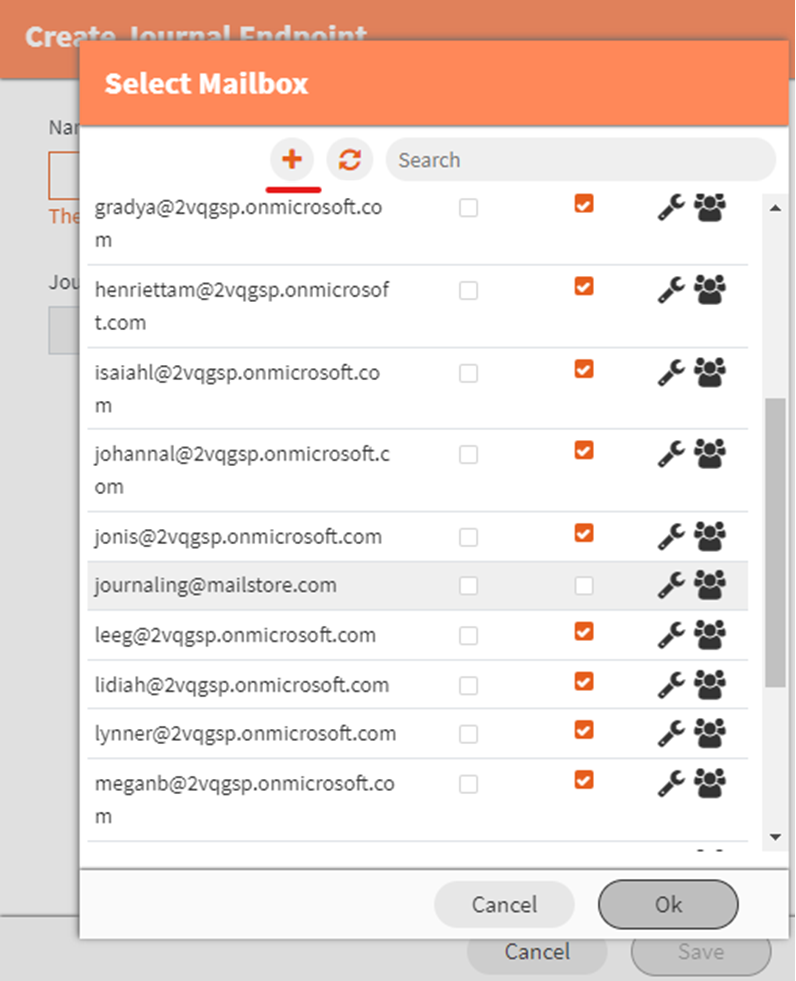
- Select a journaling mailbox. You should create a new mailbox in MailStore cloud only used for journaling. You can create a new mailbox directly from the “Select Mailbox” dialog by clicking on the + button.
Click on “Save”. After save the dialog will stay open and show a “SMTP Address” entry which can be copied: This will be used in the next step.
Configure Journaling in Microsoft Pureview
- Navigate to the Microsoft Pureview Compliance portal: https://compliance.microsoft.com/
- On the Compliance Portal, navigate to Solutions and Data lifecycle management.
- From there, click on Journal rules and then New rule.
- Paste the “SMTP Address” value copied from the AdminAccess into the “Send journal reports to” field
- Enter a name in the Journal rule name text field.
- Select a preference for Journal messages sent or received from.
- Select a preference for Type of message to journal.
- Click Next to review and submit the configuration in the next step.


Emails sent and received from now on should be redirected and archived automatically to MailStore Cloud. To archive already existing emails, you need to configure Mailbox archiving and run it once.
Note: If Non-Delivery Reports (NDRs) containing the X-MS-Exchange-Message-Is-Ndr mail header are sent to a journal endpoint, only the attached mail will be archived.
Exchange 2019 Journaling Method 1: Standard Mailbox Journaling
Create a journaling user and mailbox
- Log on to the Exchange admin center of your Microsoft Exchange environment as an Exchange administrator.
- Choose the recipients menu item.
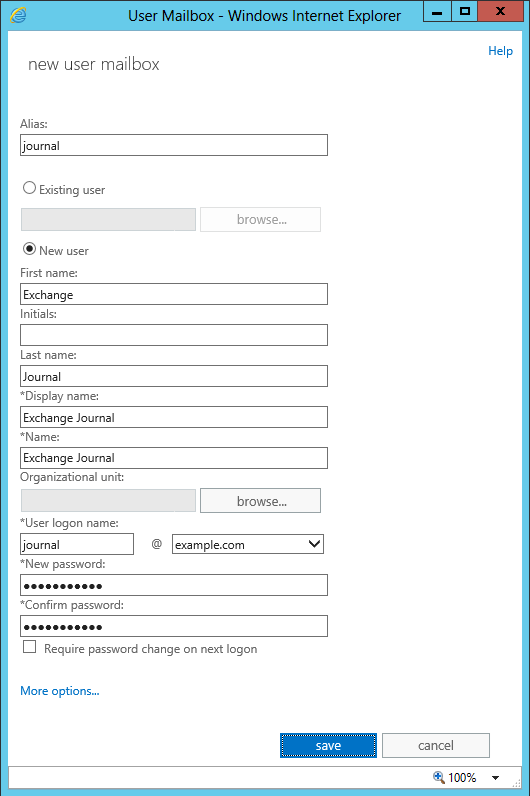
- In the mailboxes section, click on + (New) and choose User mailbox.
- Enter a valid Alias (e.g. journal).
- Select the option New user.
- Enter the necessary data to create a new user.
- Click on More options…
- Click on Browse to select a mailbox database.
- Click on save. The new user as well as the corresponding mailbox are created.
In MailStore Cloud you need to re-run the Directory Service Synchronization to add the new created user and mailbox.
Configure Journaling
- Back to the the Exchange admin center of your Microsoft Exchange environment
- Select the servers menu item.
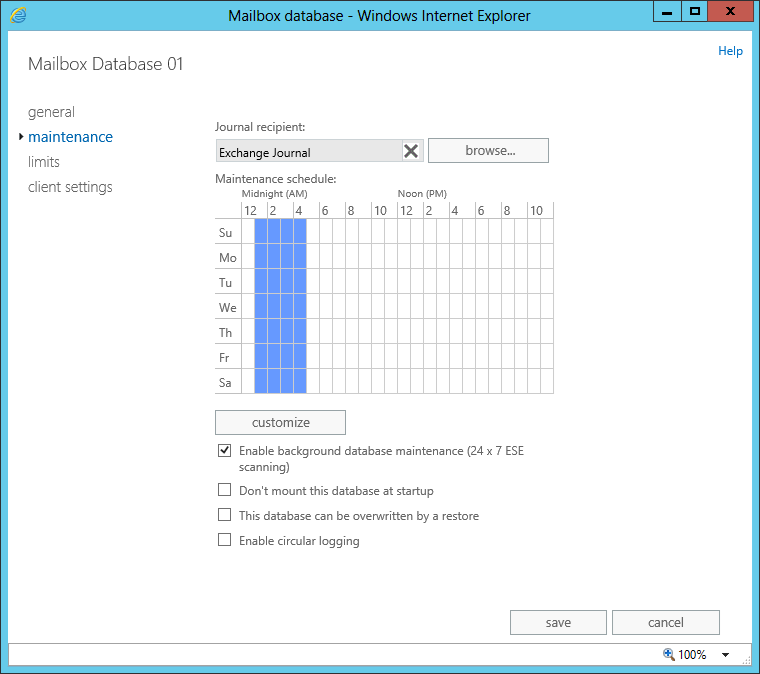
- On the databases tab, doubleclick on the mailbox database for which you want to set up journaling.
- Select the maintenance tab.
- Click on browse… next to the Journal recipient: box.
- Select the user that was created in step 1 from the recipient list and confirm with OK.
- Click on save to confirm the changes.
Create a Secret in MailStore AdminAccess
- In MailStore Cloud create a secret to login to the journal mailbox
- AdminAccess -> Secrets -> Add secret
- Type: Basic Credentials
- Enter a meaningful description
- Enter username and password of the user created for the journaling previously
- Click on save to confirm the changes.
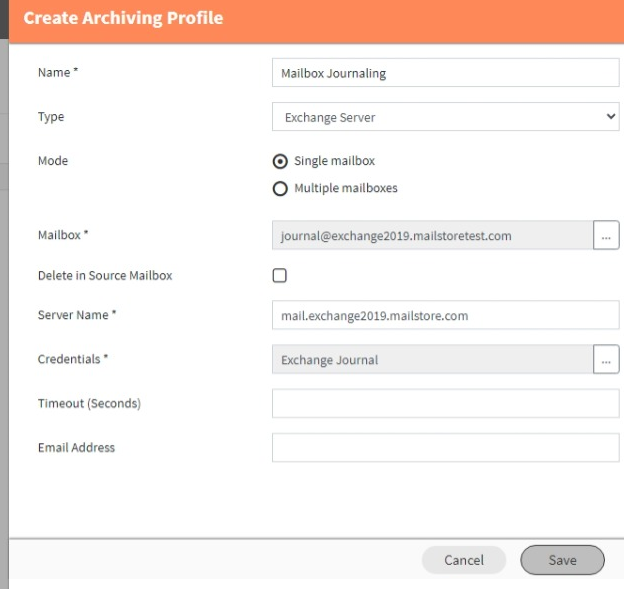
Create an Archiving Profile in MailStore AdminAccess
- AdminAccess -> Archiving Profiles -> Add archiving profile
- Type: Exchange Server
- Enter a name
- Select “Single mailbox”
- Select the mailbox previously created for journaling
- Enter the exchange server’s hostname
- Select the Credentials created in the previous step
- The timeout can be left empty to use the default
- Click on save to confirm the changes.
In the Archiving Profiles list, click on the “clock” icon on the previously created archiving configuration.
Select the recurrence: Archiving the Journal Mailbox should run periodically.
Save the configuration
Note: If Non-Delivery Reports (NDRs) containing the X-MS-Exchange-Message-Is-Ndr mail header are archived from a mailbox, for NDRs containing a journal report only the journal report will be archived, while for all other NDRs the whole NDR will be archived unchanged.
Exchange 2019 Journaling Method 2: Premium (Push) Journaling
Premium Journaling is used to push emails from the mailing system (in this case Exchange Server) directly into the archive
Notice: Premium journaling requires Exchange Enterprise CALs.
Create a Journaling Endpoint in MailStore Cloud
- AdminAccess -> Journal Endpoints -> Add journal endpoint
- Give a name
- Select a journaling mailbox. You should create a new mailbox in MailStore cloud only used for journaling. You can create a new mailbox directly from the “Select Mailbox” dialog by clicking on the + button.
Click on “Save”. After save the dialog will stay open and show a “SMTP Address” entry which can be copied: This will be used in the next step.
Configure Journaling in Exchange 2019
- Log on to the Exchange admin center of your Microsoft Exchange environment.
- Select the compliance management menu item.
- On the journal rules tab, click on + (New).
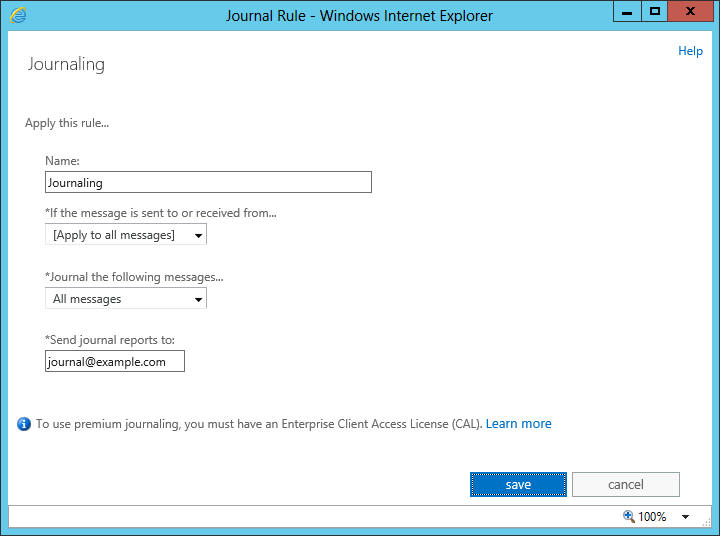
- Enter a name for the journal rule, e.g. MailStore Journaling
- In the If the message is sent to or received from… section select whether the rule should apply to all messages or to specific users or groups.
- Under Journal the following messages…, choose whether to capture all messages, internally sent messages only, or only those messages with an external sender or recipient.
- Paste the “SMTP Address” value copied from the AdminAccess into the “Send journal reports to” field
- Click on save to activate the rule.
Please keep in mind that in complex Microsoft Exchange environments it may take several minutes until the new rule becomes effective.
Google Workspace Journaling
Create a Journaling Endpoint in MailStore Cloud
- AdminAccess -> Journal Endpoints -> Add journal endpoint
- Give a name
- Select a journaling mailbox. You should create a new mailbox in MailStore cloud only used for journaling. You can create a new mailbox directly from the “Select Mailbox” dialog by clicking on the + button.
Click on “Save”. After save the dialog will stay open and show a “SMTP Address” entry which can be copied: This will be used in the next step.
Configure Journaling in Google Workspace
- Log on to your Google Workspace domain as an administrator.
- Navigate to Apps > Google Workspace > Gmail .
- Click on Advanced settings on the Settings for Gmail page.
- In the General Settings tab, scroll down to Routing.
- Click Configure or Add Another to create a new routing rule. A new window appears.

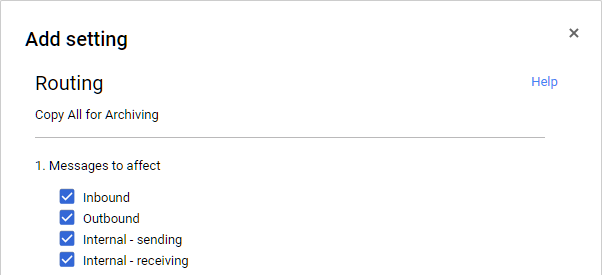
- Enter a name and enable all checkboxes in the Messages to affect section.
- Under Also deliver to, activate the Add more recipients option and Add an additional delivery recipient.
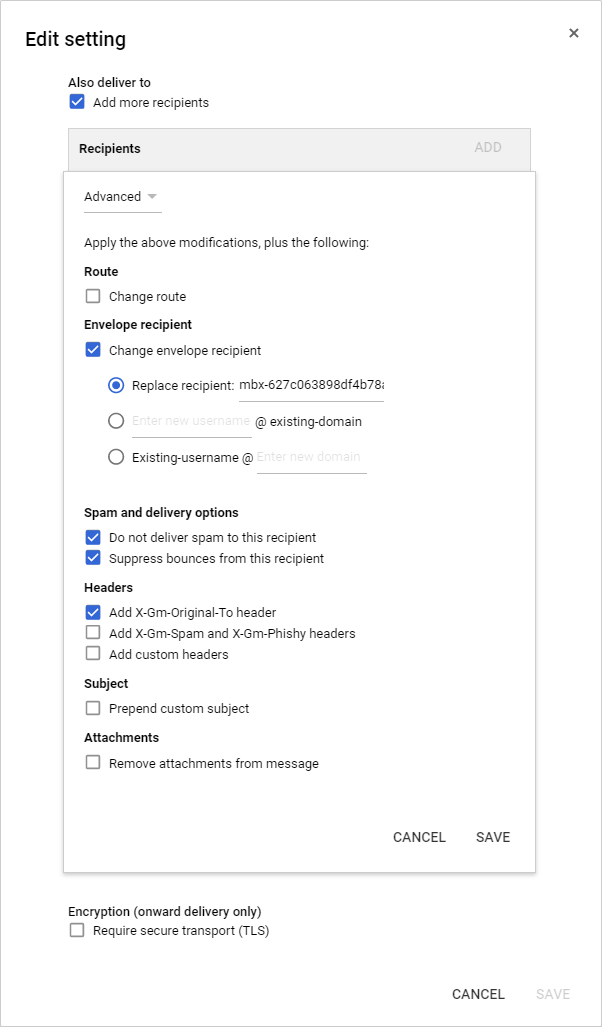
- Select Advanced from the drop-down list.
- Activate the Change envelope recipient option.
- Enter the SMTP email address created in the previous step into the Replace recipient field.
- Activate the Do not deliver spam to this recipient option if desired.
- Activate the Suppress bounces from this recipient option.
- Activate the Add X-Gm-Original-To header option.
- Click on Save further down the window and then on Add setting for a new rule or Save when modifying an existing rule.
- Click on Save in the footer bar.